Tuesday, June 29, 2010

Mood Board Creations Using Paint by Number Wall Murals

What are Mood Boards?!! They are an ingenious way of planning the design of a room! It helps to be able to visualize what your room will look like before you actually spend a penny or open a paint can. 

My sister, Christa - who is my dear friend and a DIY Diva herself, thought it would be fun and helpful to you, our followers and customers, to put together Mood Boards that include the childrens wall stickers, mural stencils and paint by number wall murals that are sold at Kids Decal Corner. A fabulous idea, I thought!! 

So, thanks to her great idea, you can expect to see 1-2 mood boards a month coming down the Project Runway on Mondays! Each mood board will feature a decal or stencil and then the suggested decor ideas to go along with it. 

If you're someone who loves beautiful rooms, but gets paralized in the process of decorating because you can't visualize how to coordinate the wall decor with the bedding ... and the paint color ... and the curtains ... and the furniture ... and the rugs ... and the accessories (Sounds overwhelming just typing it all out!) .... then these mood boards are just for you!

Obviously, we are making suggestions in our decor ideas, based on our personal taste and experience in decorating. But our hope is that our ideas act as a spring board for you and your imagination! Feel free to tweak our ideas to fit your room, budget, and taste! These mood boards are meant to be helpful tools to get your creative juices running and give you some, not-so-conventional, ideas of how to use the amazing products we sell at http://www.kidsdecalcorner.com/.

Sooooo.... Without further delay.....

Introducing.... the First Mood Board of Kids Decal Corner!!!


1. This mood boards is designed around the Birch Trees Paint by Number Wall Murals

800-BirchTrees
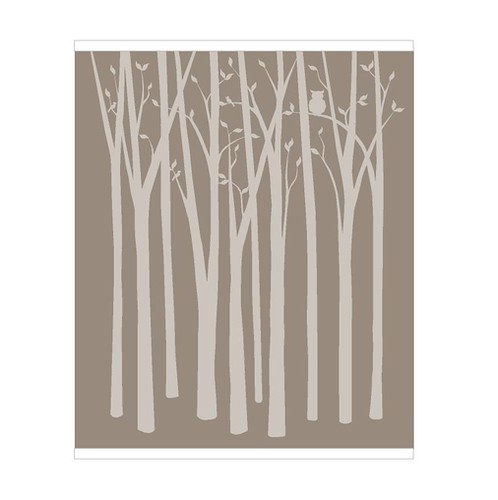
You can purchase this wall mural at Kids Decal Corner for just $69.95. As well, there are step by step instructions on how to paint this wall mural. Its a simple process of taping, tracing and painting!
We suggest painting this beautiful Birch Tree Mural on one of your four walls - preferably the biggest wall that could become your room's focal point!
2. Paint the mural wall Behr's Winding Path color. We suggest using a Satin or Semi-Gloss finish.
3. We suggest using Behr's Ultra Pure White for the ceilings and trim. Ceiling should be in a flat or satin finish; The trim in a semi-gloss or gloss finish.
4. The rest of the room's walls can be painted in Behr's Desert Plain. As well, use this color, Desert Plain, to paint the trees on your mural wall! 
5. The Rug is from Shades of Light. It is there Soho Dhurrie Rug in the Spa Blue color. If you have wooden floors this rug is a great option. Even if you have carpet, especially if its a light neutral tan or gray, this rug would still really set off the room. Rugs are a great way to visually draw your eye to the focal points of your room. For example, say you are putting your bed against the mural wall... then place your rug beside the bed or halfway under your bed... play around with it until it works for you!
6. Every room needs a little table.... We suggest a French Country Bedside Pedestal Accent Table in End White. 
7. For reclining and reading, try the West Elm Modern Weave Armchair
8. Shades of Light Blue Pendent Light. This would look great hanging in a three-some with the table and chair.
9. If you like to sew, #9 and 10 are suggested fabrics that would make great bed and chair pillows. This fabric is from European Linen in blue. This would also make beautiful curtains. I would suggest simple, long, unlined panels. You could use tabs to attach them to the curtain rod or curtain rings. I think something long and flowing would match the decor of this room best.
10. This fabric is from Waverly Berkley. Its their Striped Pear fabric. It's hard to give you a picture of this idea, but remember you can use a small section of your paint by number wall murals to trace onto the fabric. Use a coordinating dark or light gray fabric paint to create a simple and eloquent pillow that ties in your mural with the rest of your room.
11. For a stylish headboard, try the West Elm Overlapping Squares Twin Headboard. This bed says sophisticated and warm!
12. To tie it all together, DKNY offers a beautiful Oasis Duvet Cover

Hope this Mood Board to helpful! Thank you, Christa, for all your effort to bring us this sophisticated yet warm bedroom!


Monday, June 21, 2010

Project - Runway: Alphabet Wall Stickers Part 2.... BIG REVEAL!

Last Monday, I gave you step by step instructions on how to use the Alphabet Wall Stickers to make a BIG impact for a LITTLE price! With a few kids decals, a little paint and a few hours of work you can have....

Drum roll please!!!!


Alphabet Wall Stickers - Part 2


A fun and colorful wall that says "Wow" !

Not only will your kids love it, but so will your wallet! Most projects that make this kind of impact can cost LOTS of money! But not this one!


Remember, you can use this same idea with any of the wall decor decals sold at Kids Decal Corner. What works the best, are the smaller, multiples per pack. But, you could also use this sort of idea with the Giant Kids Decals. Your painted block would, obviously, be much bigger than for the smaller decals.

These blocks create a visual background and border for your decals .... Making them look more "finished". Another idea for your Giant Kids Decal Blocks, is to use coordinating colors and paint varying sizes of stripes around the outside edge of your painted block. Just like you put multiple colored mats around a custom framed picture, these stripes can act in a similar manner. So whether they're bigger or smaller, they act as a great accent to your kids decal!


Budget breakdown!

    * Alphabet Wall Stickers: $23.95 ( bought from Kids Decal Corner  )
    * Acrylic Paint bought from my local Craft Store: $4.00 ( $1.00 each... used 4 different colors)
    * Painter's Tape: $2.95 from Walmart

Total money spent:   $30.90

If you have any questions about how to accomplish this project, please refer back to the instructions for Alphabet Wall Stickers Part 2.  If you still need help, don't hesitate to email me at request@kidsdecalcorner.com. I'd love to hear about your project, help you out along the way, and then celebrate your finished product with you when its all done!

So, there you have it.... Two different ways to use the same kids decal to make some fun and creative wall art! Hope you have as much fun as I did with these projects!

Stay tuned for our other fun and beautiful wall art projects.... coming down the Project - Runway!

Thursday, June 17, 2010

Measuring Up... With Kids Decal Growth Charts!

Before becoming a Mom, I never realized how fast kids grow. I remember as a little girl, people saying, "Wow, honey, you're really growing up fast!" As a kid, I couldn't grow up fast enough! Now as a Mom, my kids can't stay small long enough!
Either way, keeping track of how BIG your kids are getting, is a fun and memory building activity! Maybe you've just kept track with pen marks on the back of a door or on a wall.
 
Well, NOW, you can add style to the way you keep track of your children's sprouting.
Kids Decal Corner offers a nice variety of kids decal GROWTH CHARTS!

Watch your little girl grow with our delicate Little Princess Wall Stickers Growth Chart! This beautiful kids decal heart vine comes complete with repositionable ribbons that can be used as height markers (or just as additional decorative elements). Fun, beautiful and interactive all in one! And for a very sweet price too, only $18.95!!


Watch your boys grow with this fun and interactive Bob The Builder Boys Wall Stickers Growth Chart. Use the peel and stick tools as markers or simply as decorative elements. Not only can these growth charts add decorative fun to your kid's walls, but they're very convenient too (which us doesn't like convenient?!).


I know for myself, I can often have good intentions about keeping up with baby books, memory books, growth charts, but sadly I often fall off the wagon!  


With these decal growth charts, how could it be easier to keep up with our kid's growth spurts? 

Instead of running for a pencil when the thought crosses your mind .... then getting distracted (heaven knows that happens all the time ) .... then forgetting ( I think there is something sadly REAL about the "mommy brain" theory ) .... and as you and I know, the cycle just keeps going on and on! 


But, NOW, as soon as you think, "Oh, its been a few months since I checked to see how tall Johnny is ... " you can march little Johnny over to the wall, peel off the marker and stick it back on the wall at his new height!
 

Watch your little Thomas enthusiasts grow with this ultra cute Thomas and Friends Train Wall Stickers Growth Chart. Stick the chart on any wall, door, or mirror, and use the additional suitcases and arrows as repositionable markers. Keep yourself and your kiddos on track for a toot'n good price of only $18.95!


Not only are these Growth Charts a fun activity, but its great for kids to quantitatively see how much they're growing!
While you're measuring their new vertical accomplishments, take the opportunity to encourage them on how they're growing up in character and personality.  

 
 Our kids love to hear all the ways we love them and think they're special!


This Woodland Friends Growth Chart Kids Decals is great for measuring multiple children and because its gender neutral, your boys and  girls will equally be excited! It comes with 3 name tag leaves which can be used as the growth markers. Lots of adorable woodland animals and birds that your children will love! Fully assembled it measures over 7 Ft. tall! The ruler starts at the bottom of the trunk, at 24 inches, and goes up to 60 inches! 
I have this growth chart in my house... and we love it!

A little assembly tip: If you layer the decals slightly behind each other, it gives the whole image a three-dimensional appearance! Because these kids decals are removable, you can adjust the items as often as you need to until it's just right!  
It really is too much fun!!


Not only can these cute Growth Charts make it easy for us parents to measure our kid's exterior changes, but its a good reminder to encourage them of the interior changes as well! 

Come on over to Kids Decal Corner, and start measuring up with our kids decal Growth Charts... you'll be glad you did!

Monday, June 14, 2010

Project - Runway Monday: Alphabet Wall Stickers Part 2

What do you get when you combine the Alphabet Wall Stickers (from Kids Decal Corner) and some cheerful paint colors???? 
A REALLY cool wall design for a really cheerful price!!!

For this week's Project - Runway Monday Alphabet Wall Stickers Part 2 .... I will walk you through how to use some cute, but simple, kids decals to make an extra BIG impact to your room.

You'll have to tune in next Monday, to get the final pictures... isn't it fun to anticipate :)

First I want to start by saying, you can use any of the wall decor decals that I sell at www.kidsdecalcorner to do this sort of project. I'll say more about how to adapt this project to fit whatever kids decal you might use next Monday.

I did this project with my future play/school room in mind. The room we currently call an "office" is more like a catch all room. But someday.... I have big plans to convert it into a playing/ learning room. However, we're far from being able to put the fun touches (like wall decor) in the room. So for now, I had to be content to try it out in my son's room. He thought it was pretty cool having all the letters of the alphabet on his bedroom wall!

The inspiration behind this project was the desire to create a large visual effect without breaking my meager budget. You can do this by painting colored blocks onto your wall to give the appearance of a collage of pictures. Follow the set by step process below and you too can create a beautiful array of color on your wall for a super cheap price! Who says you have to spend money to have a beautiful room?!

Step 1: Gather Your Supplies!
  • Level
  • Measuring Tape
  • Painter's Tape
  • Stencil Paint or samples from your local paint store would work just as well.
  • Brushes
  • Chaulk


Step 2: Planning!

Its always best to plan out your project before you start marking and painting. Trust me, it will save you time and frustration in the long run... I know from experience :)
  • Lay out all your Kids Decals and pre-determine what colors you will paint each of the blocks of color.
  • Determine how big you want each block to be.
  • Determine what distance you want between your blocks... width and height.
  • Determine where you want this collection of blocks to be positioned on your wall... making sure its centered on the wall. 
For my project with  the Alphabet Wall Stickers... I measured 2 feet from the ceiling to start my first row of blocks. Then made sure that it was centered ( left to right ) on the wall. Because I had a narrow section of wall, I decided to paint 6 rows of four blocks and then put the extra 2 alphabet blocks on the bottom left corner - making row 7 with two blocks. I made each BLOCK 3 inches apart from one another. And each ROW was 2 inches apart.


I suggest - especially if you have multiple decals and blocks - that you use scrap paper and cut it to the size of the block you plan to paint. Tape them to the wall to give you a visual of how that size will look. This way, you can play around with the size and position of your "blocks" before you start marking and painting.


Step 3: Measure, Mark and Tape!
  • Using your tape measure, start measuring your grid of blocks onto the wall. I suggest you start at the top. Measure down from the ceiling your determined distance, mark it with the chalk and then use your level to draw the line for the top of your first row. Now from your first line, measure down your determined distance for how big (long ) your individual blocks are going to be. My blocks were 8 1/2 in. long by 6 1/2 in. wide. Its easiest to do all your horizontal lines first and then measure out and mark your vertical lines. You will end up with a chalk grid on your wall.
  • Once you have a chalk grid on your wall, start sticking the Painter's tape on the OUTSIDE of the chalk lines (see picture below.... notice that the edge of the tape is on the OUTSIDE of the chalk line ).


When you're done taping your grid, it should look something like this. Notice all the blocks you've created with the tape?


 Step 4: Protect Your Edges!
If you've ever used painter's tape before, you know that often paint will bleed underneath your tape.... leaving a messy edge. I have the trick you need!!!!
Before you use the block color , use the original wall color and paint around the inside edge of each of your blocks. This will seal off the edges. So where your paint bled under the tape, you won't notice it, because its the same color as your wall.

Let the wall color dry completely.

Step 5: Paint Your Blocks!
Now using the designated colors, paint each of your blocks. I suggest using two thinner coats, than one heavy coat. Make sure you cover every spot in your taped off block (covering over the wall color that you previously painted ).

Allow the paint to dry completely. Remove the painter's tape and you will have a beautiful rainbow of colored blocks on your wall!!! Give the paint 2-3 days to set before you apply the decals to the blocks.

Step 6: Peel and Stick Your Kids Decals.
The beauty of these wall decor decals, is that you can apply them as many times as you need to until they're in that perfect spot!


Well, that's all for this weeks post on Project - Runway Monday!!! As always, I anticipate your thoughts, comments, questions or any fun and cool ideas you have!

Check us out next Monday to see the final reveal of this project!!! Plus, I'll give you the budget breakdown of how much I spent to create this amazing wall art and other ideas on how to adapt this idea to different kids decals!

Saturday, June 12, 2010

Saturday Sale Reminder for Kids Decal Corner...

Just wanted to remind you of the GRADUATION SALE going on at Kids Decal Corner for the month of June ... just a few more weeks left!


When you buy from the TEENS section at Kids Decal Corner, you will receive

$10 Off a purchase of $50 or more! 

Teens love to express themselves, but are pretty limited when it comes to pimping out their dorm rooms. That's why our modern wall decals are perfect for them! They're cheerful, cheap, and are a super quick way to show off who they are without messing with the paint of the college dorm! College can be an uncertain time... No need to worry about wasting your money! These reusable wall stickers can move around with your Grad's changing locations or schools.


If you're not sure which of our decals they would like.... no problem.... we offer Gift Cards... just go to www.kidsdecalcorner.com

When you send your special grad off to college with these great kids decals... don't forget to remind them of how versatile they are. They're not just stickers for walls, but can be used on
  • Lockers
  • Textbooks
  • Furniture
  • Mirrors
  • Cars
  • Walls
  • Floors
  • Bathrooms
The options really are limitless!!!!

Give the gift of design to your Grad and send them off to their future with style!

Thursday, June 10, 2010

Thursday Reviews: Sesame Street is Coming to Kids Decal Corner

" Sunny Days... Keeping the clouds away.... 
Can you tell me how to get.... How to get to ...
Sesame Street!"
 All your favorite Sesame Street Characters are coming to Kids Decal Corner! These giant friends from Sesame Street can make a BIG impact to any room decor.  At 6 feet tall, Big Bird can bring a smile to your child's face and help him feel that he's always got a friend in his room! Whether you use these furry characters by themselves or create your own sesame street by using the whole gang of them.... you can easily design a room full of fun and color with these simple and affordable peel and stick kids decals.

Another fun place to stick these famous friends would be a toy room or learning room. Sesame Street is all about learning, so why not include these furry friends in your child's learning environment! A great addition to this learning theme, would be to include our Colorful Alphabet Wall Stickers! Or the Educational Alphabet Wall Stickers which offer an object for every letter of the alphabet and numbers too. Because these kids decals are peel and stick, repositionable and reusable.... they're a great hands - on way for your child to learn their ABCs.


What little girl doesn't like a little fairy magic on her wall? In the sweet colors of lavender and teal... Abby Cadabby brings lots of charm to the wall and room decor. At nearly two feet tall, she's a great addition beside a bed or "standing" on a dresser or tucked beside the door.


I think many people find painting and room designing a scary adventure, because " What if I don't like it?" ... "What if I picked the wrong thing?"... the thoughts of doubt just keep coming. If you're one of these people who finds designing a scary proposition.... and instead of doing something you're not sure of, you just don't do anything at all..... These kids decals are just the thing for you! But don't keep taking my word for it. I'll garauntee that when you buy your first kids decal ... it won't be your last! They're fail - proof! If you're not sure what color you want to paint the walls ... just take your decal along to the paint store and you can match the colors. If you're not sure about bedding, again tuck these decals in your bag and you can make sure that these childrens wall stickers will match.
If you're looking for coordinating wall decor... try using a combination of the giant kids decals plus the border. Its a simple solution to a great room. The border is 5" high and 5 yards long. Its easily cut to fit the size of your room.


And don't forget.... these kids decals aren't just stickers for walls. They can be used on any hard surface....
  • Furniture
  • Mirrors
  • Doors
  • Windows
For a fun project, try using the Sesame Street Kids Decals to make your child's own personalized art. See the Getting Creative section at www.kidsdecalcorner.com or scroll down and check out my last post, Project - Runway Monday; Alphabet Wall Stickers Part 1. In that post, I show and explain how you can make some really fun canvas wall art using these versatile kids decals.

As always... I'd love to see your creations! Don't let fear hold you back.... Let loose, have some fun and you'll be surprised just how great your room can look when you use these Fail-Proof Childrens Wall Stickers! Looking forward to hearing from you!

Tuesday, June 8, 2010

Project - Runway Monday: Alphabet Wall Stickers Part 1

More than meets the eye....

That's what I think when I see the kids decals at Kids Decal Corner. A little time, a lot of creativity, and you've got more than just an ordinary kids decal.... You've got a one of a kind room!

In Part I of Alphabet Wall Stickers, I will give you a step by step plan on how to make your own wall art using kids decals. Really, you can use this plan with ANY of the smaller kids decals. I just picked this one, cause I love the colors and characters.

 Step 1:
 Gather your supplies:
  • Canvas. For this project I used 4 cheap art canvas's from Walmart ( $6.00 for 2 ). There are varying sizes, so I recommend taking your kids decals along with you to the store to get a better idea what size will work best with the decal you have. This project I used 8x10.
  • Paint. I usually use the Folk Art brand, but mostly go with whatever color best matches your color scheme.
  • Brushes and sponges. I like to use regular craft brushes and sponges work great too. If you want to do any special paint detailing you'll need smaller brushes for that.
  • Ruler and Chalk for sketching a plan on your canvas before you start putting the finishing details on it.
  • Ribbon or Twine for decorating the outside edge of your wall art.


Step 2:
  • Paint your canvas. You should paint the edges as well. If you want you could use a coordinating color for the edges. Let the canvas dry completely before applying the kids decals
  • A few fun options for a textured background: Try using a sponge to create dark and light spots; try dragging a dry paint brush (like you'd use to paint a wall) through your wet paint - drying your bristles in between till you create the look you like. Have fun and try new things. Remember... You can always paint over something you don't like.... so don't let fear hold you back!!!

Step 3: 
  • Place your decal on your canvas. It can be centered, it can be off-centered, whatever looks good to you. The best part about this is, you can reposition your kids decals as many times as you want until it meets your satisfaction!
Step 4:
  • Decorate the canvas. Its best to use a pencil or chalk to sketch out your plan before you start painting it.
  • Some fun options include: Dots, boarders, stripes, scallops.... just for a few examples.

  • Dots: the easiest way to create dots is to buy a pre-cut sponge in the size circle/ dot that you want. Again you can find these in the general crafts department of your craft store. You could even try some polka dots as a background before you put the kids decal on it. Try using a lighter or darker shade of the same color of your background paint.
  • Stripes: Make them straight, squiggled or different width and colors. I highly recommend using a ruler or small craft level to give yourself a guideline for these stripes ... even squiggly stripes. Its better to have a "straight" squiggle than a crooked one!

  • Scallops:  The quickest way I know to do these is to use a small round object from around your house, a kids paper cup works great. Trace 1/2 the circle along the edge of your canvas. Continue to repeat this until you've created a scalloped boarder. You could either paint the "inside" edge or "outside" edge of this scallop using a coordinating color to the background.
 Personalize it! I didn't do this with the ABC wall art, but you can easily personalize your wall art by adding your child's name to it. If you're not very good at free handing a name, try printing it off your computer in the font and size you like. In order to get the name on your canvas, put some carbon copying paper behind your computer paper and trace the outline of the letters with a ball-point pen. When you pull up your paper and carbon you will have an outline of the name on your canvas. Simply paint it in and walla.... you've got a personalized wall plaque for your child's room

Decorate the edge with ribbon, jute, twine...
Simply use a glue gun to glue your accessories onto the edge of the canvas. You could also use jewels to decorate the front of the canvas as well.


Ready for the finished product?

Now you can see just how much fun and how easy it is to create your own wall art using kids decals! Let me know how it goes for you. As always... I'd love to see pictures of your own projects and hear any good tips and ideas you have!!

Have fun decorating.... and come visit us next Monday for :

Project - Runway Monday: Alphabet Wall Stickers Part 2

Saturday, June 5, 2010

GRADUATION SALE --- On all Teen Modern Wall Decals

Grad Sale on Teen Stickers for walls and more.

Sending out a Big Hurray for all our grads this month!! In celebration of all your hard work, we're putting on a GRADUATION SALE at Kids Decal Corner just for YOU!

From now till JUNE 30th, take $10 off any purchase of $50 or more from our Teens (only) section. Enter in coupon Code: grad10 upon checkout to redeem this great deal!


Need a Grad Gift? We offer Gift Cards at Kids Decal Corner...
so come on over and check out our very cool and modern wall decals and give your special grad a Fun and Useful GIFT!

These amazing peel and stick reusable wall stickers are GREAT for teens heading off to college. WHY?
  • They're CHEAP!
  • They're QUICK and EASY!
  • They're REUSABLE... meaning they can take them from one bedroom to another!
  • They're STYLIN'!


These wall decor decals are not just stickers for walls... try them on
  • Lockers
  • Cars
  • Furniture
  • Walls
  • Lamp Shades
  • Mirrors
  • Text Book Covers


As you know.... this new season of college is exciting but has its challenges. What better way to keep track of homework assignments, social events and memos than with these ingenious peel and stick Chalkboard Stickers!

If you're going to get organized ... you might as well be stylin' too!! Below are a few examples of the cool chalkboard stickers we offer at Kids Decal Corner.

Chalkboard Stickers - Skaters
Chalkboard Stickers - Rococo

So from Kids Decal Corner.... HAPPY GRADUATION and have a wonderful summer!!!

Wednesday, June 2, 2010

Decorative Stencils for walls and more.

Dots... Dots... and more Dots! 
Polka Dots are the a popular item when it comes to room decor. These decorative stencils are great and very easy to use. Not to mention, the possibilities are endless... so let loose and have some fun! Hopefully these images will start your creative engine. Using these murals stencils is an easy 5 Step process...

As the picture above shows....
  • Peel the self-adhesive stencil from the backing
  • Stick it to the wall (or other surfaces... we'll talk about this later)
  • Using a sponge or stencil brush, Paint in the stencil.... usually 2 thinner coats work better than one heavy coat of paint
  • Remove the stencil as soon as you're done painting
  • Reuse your stencil to keep creating the beautiful look your want.


When you buy the Polka Dot Mural Stencils from www.kidsdecalcorner.com you will receive:
10 self-adhesive polka dot wall stencils (2 of each size)


Its best to come up with a game plan before you start painting. With a piece of chalk you can easily sketch out on your walls where you want your polka dots to go. If you want to change your plan, simply wash off the chalk and start again! Even if you've painted and then change your mind... use your base wall paint and paint over the stenciled dot.


Below is the Fabulous Flower Mural Stencils. This kit comes with: 
16 self-adhesive wall stencils (2 of each flower)


The Fabulous Flowers and Polka Dots are not just stencils for walls.... use them to:
  • Art: Create beautiful wall art or name plaques. Using a plain art canvas or wooden plaque, paint the background a coordinating color... then stencil one or two flowers or dots on top. Overlap them, position it off center or centered, add a name. Talk about fun and PERSONAL!
  • Fabric: Stencil a flower or dot onto Fabric (using matching fabric paint), to create matching pillows for the bed or chair. Try stenciling a row of dots or flowers along the top or bottom of plain curtains to instantly create bring them to life while coordinating them to the rest of the room.
  • Furniture: Try adding a single flower or dot on a dresser drawer or night stand, place the knob right in the center of your flower or dot. Now that would look cool!
  • Chalkboard Areas: Create a place for expressing creativity, by painting a square or oval on the wall with Chalkboard paint. Then use your stencils to create a decorative boarder around it!
  • Accessorize: Want a little sparkle to the walls? Add sparkling jewels to your dots and flower by using a glue gun.
For an even greater look, try combing the Fabulous Flowers and Polka Dots Mural Stencils together! You can buy both at Kids Decal Corner or click above (at the right) to connect to the Mural Stencils products in our store.


All our mural stencils are made by Dream Catcher Kids and come with a suggested list of colors, but obviously you can use whatever colors you like. You can purchase these acrylic stencil paints from any local craft store like Micheals or AC. Moore or Walmart.

Price: it always comes down to the dollar, doesn't it? Honestly, you can't find a better deal out there...
For each mural stencil kit, you pay $24.95... and just think of ALL you can do with these decorative stencils!!


I always LOVE to see your amazing creations... so send me your pictures at info@kidsdecalcorner.com... I can't wait to hear from you! Happy Designing!!